(I use my ATG gun for all my general adhering needs)
1. Begin with a color on color printed background paper.
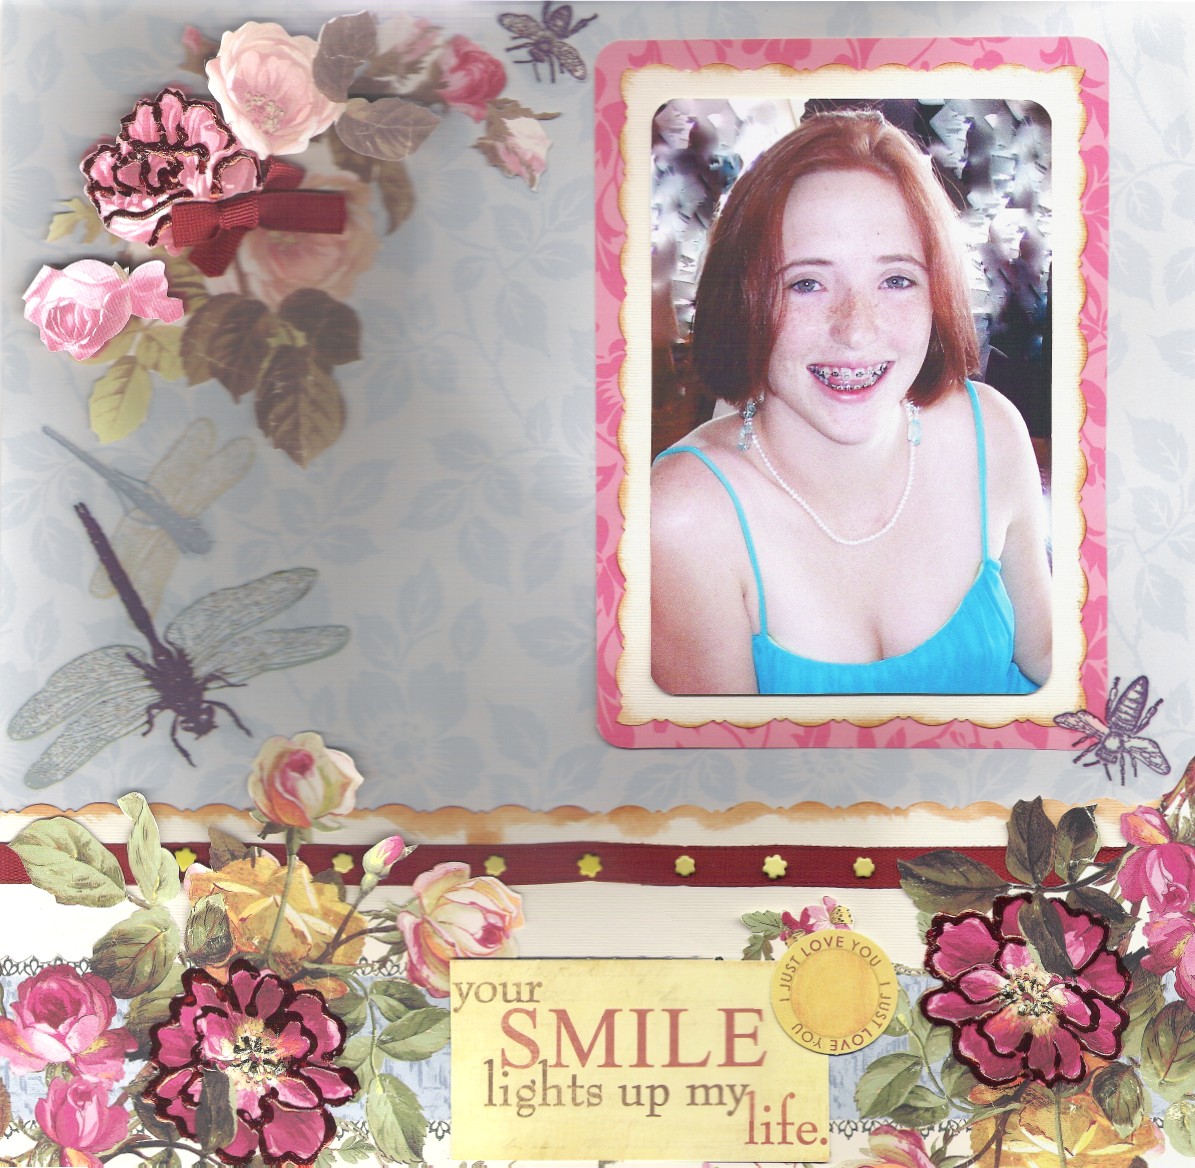
2. Take your photo (or photos) and round the corners.
3. Mat your photo with cream paper. Cut the mat with decorative scissors and ink the edge, then mat again in coordinating
color on color printed paper. Round mat edges.
4.Place photo on background paper.
5. I work on the top of the page first. Take your large floral paper and cut some random flowers from the top half of
the paper only. Be careful to cut around any flowers you do not use for later use.
6. Take your largest floral diecut and place it on the top corner. Use the flowers that you randomly cut and arrange
them to your liking over the large diecut. Use you foam pad to raise some of the cut out flowers to add dimension.
7. Here comes the tricky part, the bottom half of your page. I took the remaining large print floral paper and turned
it over. On the back draw a straight line across the paper about 4 inches up from the bottom. You will use this as a cutting
guide in a moment.
8. Turn your page to the front and hold it up to the light; do you see where some of the flowers rise above the line?
You want to cut around those flowers that form around either end of the paper and follow your cut line towards the center.
Look at the photo to help make sense of this. Your paper may not be the same so the floral spray will look different but that's
O.K.
9.Adhere down the floral cutout paper to the bottom of the page but do not use ant adhesive behind the flowers
that come up above the cut line.
10. Cut out a 12 " long 1 1/2" wide strip out of your cream paper with decorative scissors. Ink the edges. Glue the ribbon
down the center of the strip and add flower brads. Adhere the strip as a border between your two decorative papers making
sure that the flowers you cut around overlap the strip. You may now use adhesive on the back of the flowers if you need to.
11.Place your words where appropriate for you.
12. Use die-cut flowers and leftover flowers you cut and pop them up around the lower flowers on the page like you did
on the upper corner.
13. Use PVA glue and trace around random flowers. Let it completely dry and then press down foils on the glue. Tye a
bow from left over ribbon and glue to top corner bouquet.
14. Add bug stickers.